1983 Audi quattro-Interior and Wiring
by cbrydon • April 24, 2012 • 1983 Audi ur quattro 20VT
Moving forward on multiple fronts…
In an effort to identify any items that I’ve not thought about yet, a bit of mocking things up has started. I had some bits and pieces that I needed to start to go through and make sure things were going to work. And if not, start to figure out what to do…
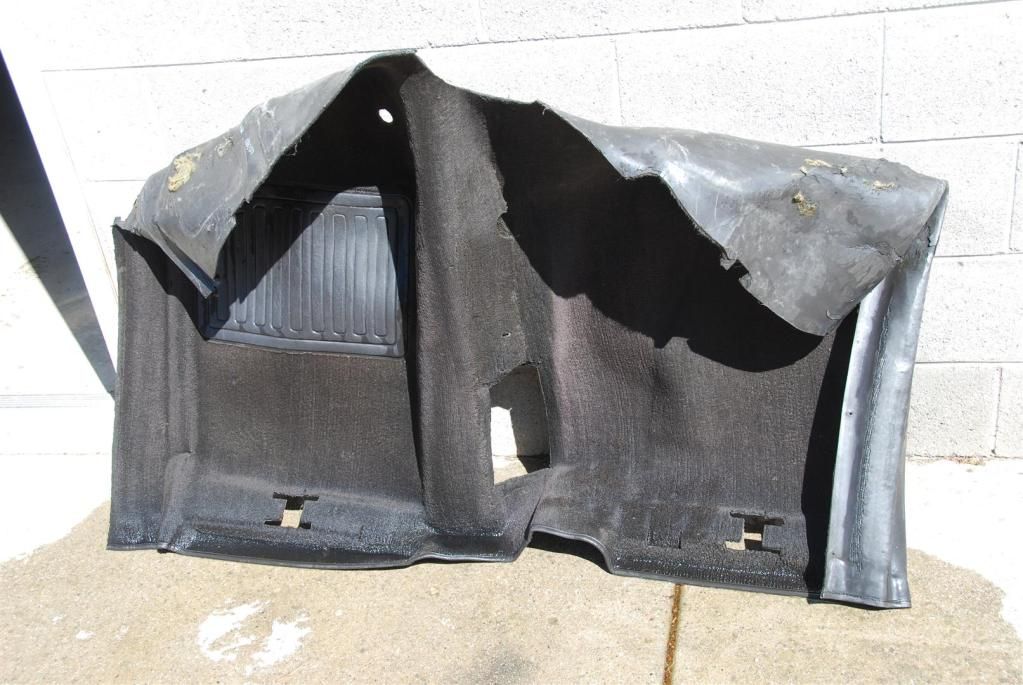
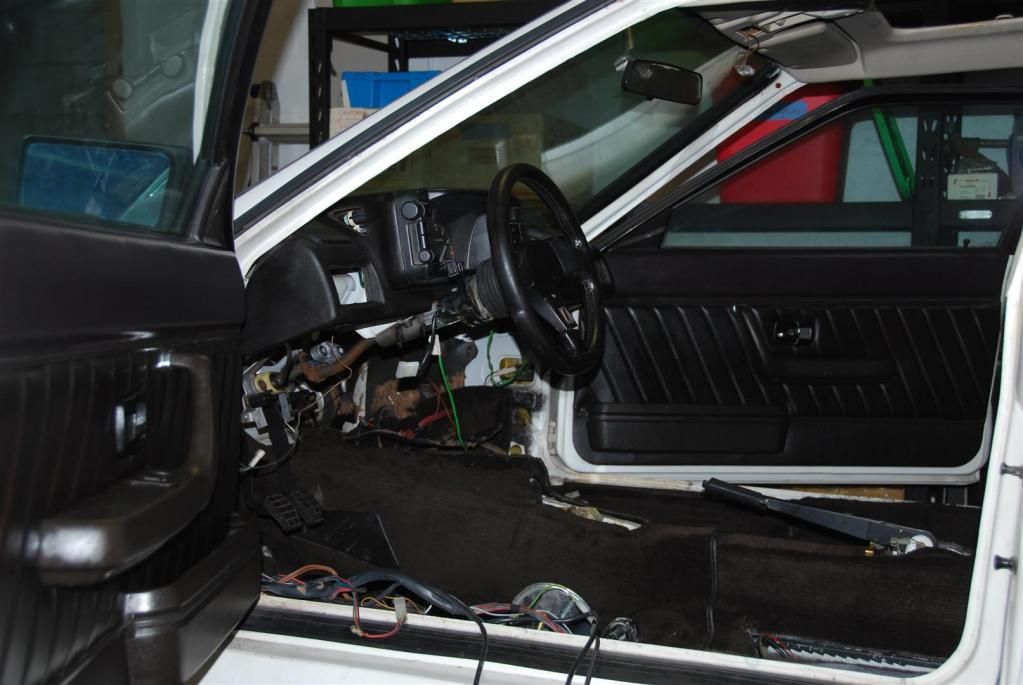
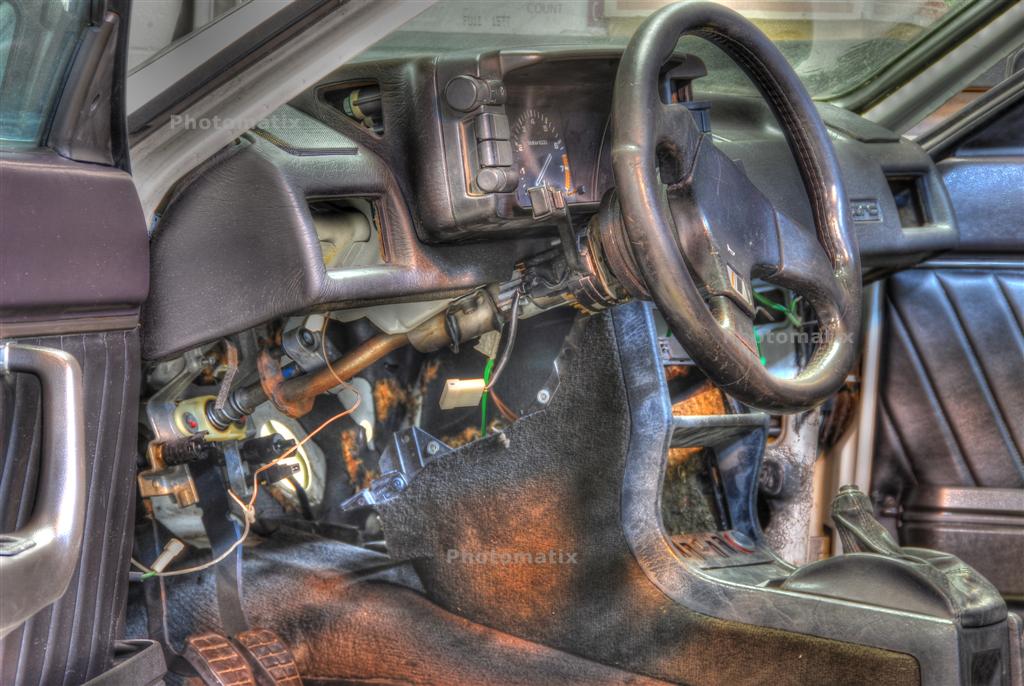
I picked up some brown carpet from a 4KQ in the yard during summer 2010. It was in pretty good shape—not perfect, but pretty good, and mine was surely not. If you recall, this is what the original carpet was looking like:

That was not going to cut it, and I am quite fond of dark brown interiors, so I was going to replace and upgrade with brown pieces. The updated dash and console is all brown. Since I’m using the urS seats, which are black, there will be a two-tone effect, but I’m hoping it will look OK. It looks good in my head for now. I also sourced a late black leather rear seat to use, which should bring things together. I still am in need of the rear parcel shelf for this car.
So back to the carpet…I wasn’t sure how good the 4KQ carpet would fit, but looked around and there seemed to be only minor differences, which I can’t recall ATM. Being 20+ years old, they required some serious cleaning. The dirt just kept coming and coming, but finally they were clean enough.
The front one is extremely heavy with the sound rubber underneath. Drying out in the sun…
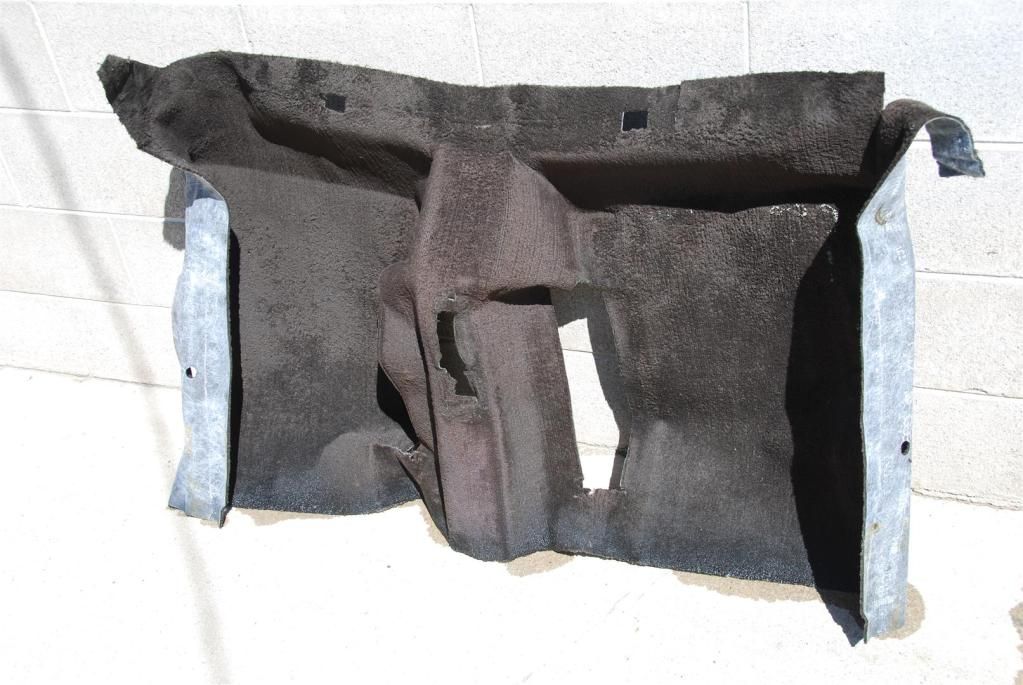
The rear one is only standard formed carpet. Much quicker to dry, too…
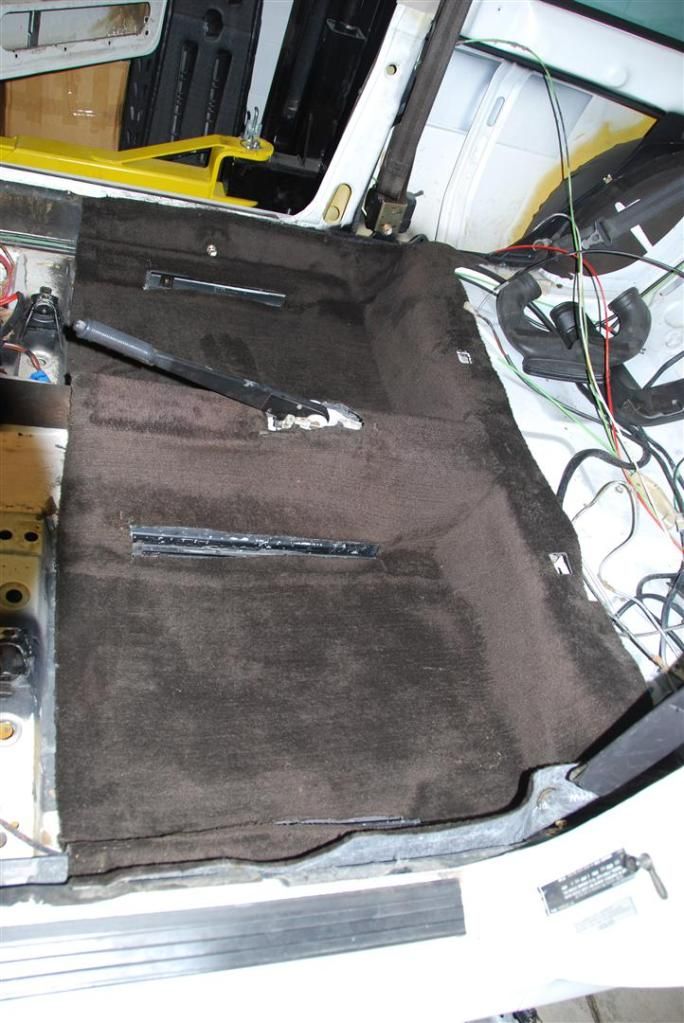
So, let’s see how they fit…Rear looks good…
Oh, yeah…I like that…let’s see how the front fits…
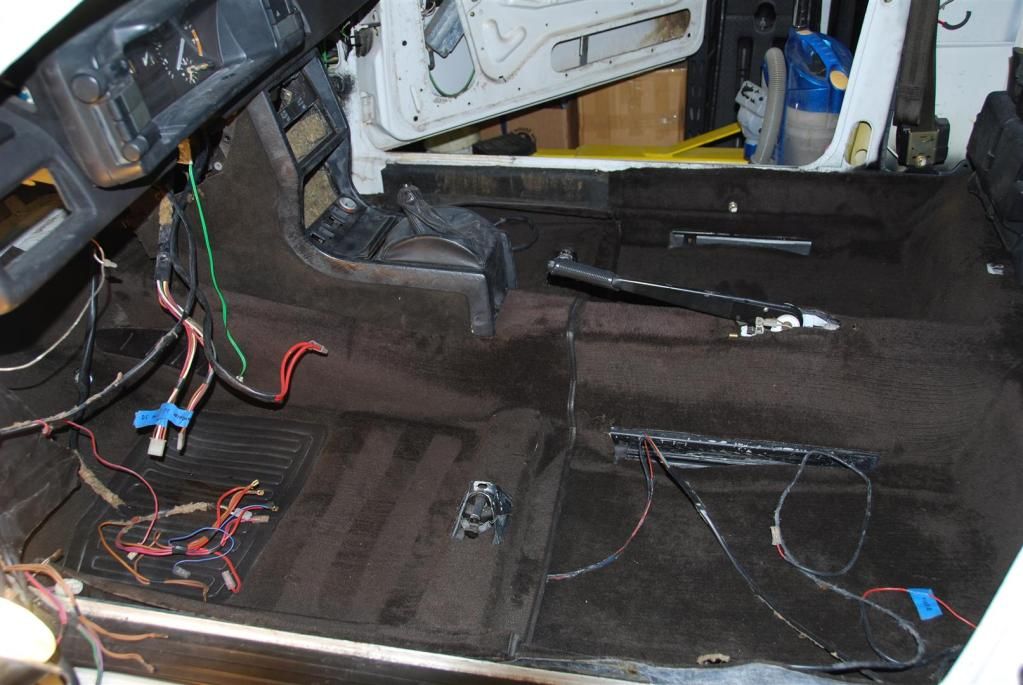
So I can’t stop there. Not only is this helping out with the test fitting, but it’s clearing up valuable space in the electronics area. Let’s see how those door panels are looking…
First, we need to put some new plastic on the doors…4 mil…

I did that to both the doors and held the plastic in place with some good ol’ 3M Super77 spray adhesive. Then it was time to get the door panels back in place. They were kind of curled from being sun-baked for so long. I gave them a bit of reverse tweaking to straighten them out. Not too shabby…
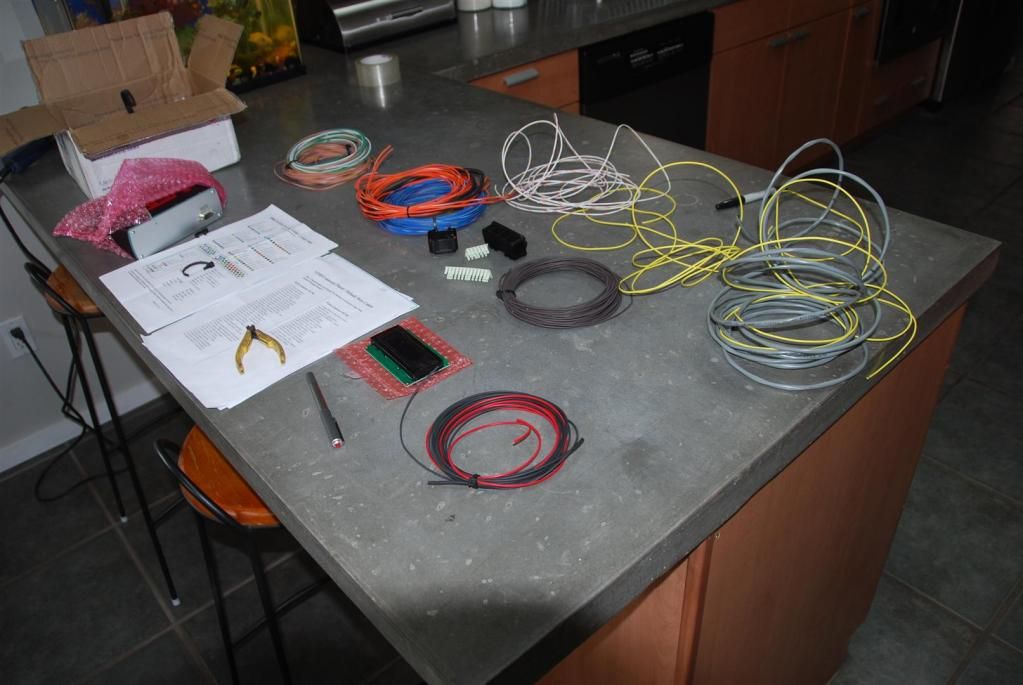
Now that all that is cleaned out from around my electronics bench, I can get this set up again to do some work on the wiring…
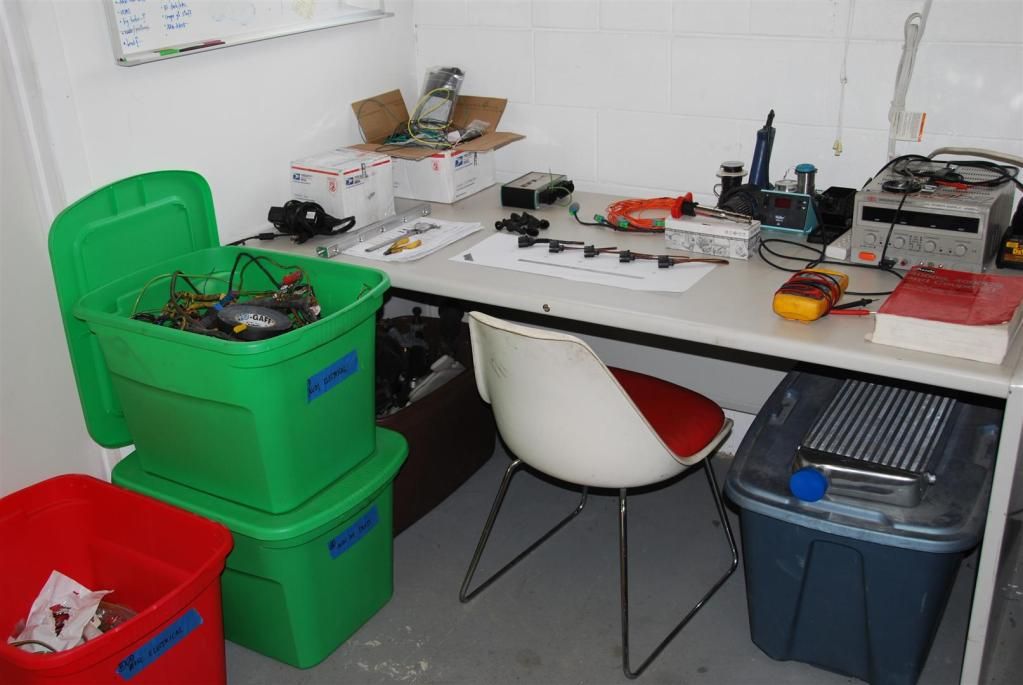
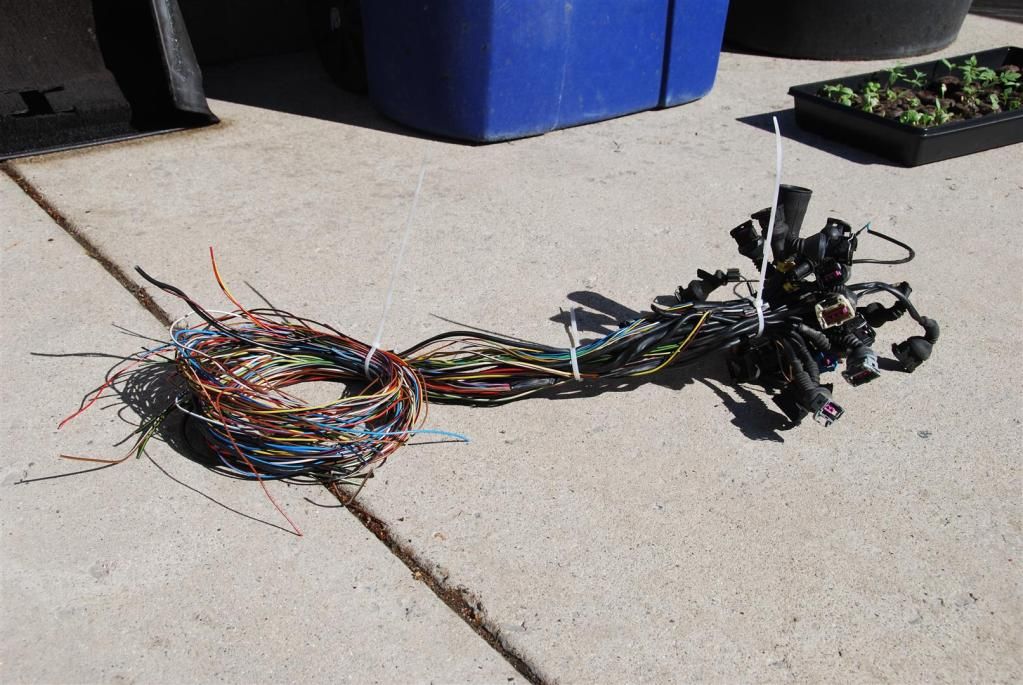
The two green tubs are filled with Audi harnesses and pieces of harnesses. In an effort to minimize costs, I’ve been trying to reclaim used connectors whenever possible, so long as they are not compromising integrity of the circuit.
Doing it this way makes it a little more challenging to build the harness, because I have to get the wire lengths and connector position right at the beginning. No crimping contacts for the connectors at the end. This means that I won’t be I’ve picked up pigtails for most of the connectors that I am upgrading to (EV14s, Bosch coil packs, LSU 4.2 WB, etc.), and can use the JPT from old Audi harnesses for most of the rest. And then the assortment of the interior round style connectors for tying harnesses together on the interior.
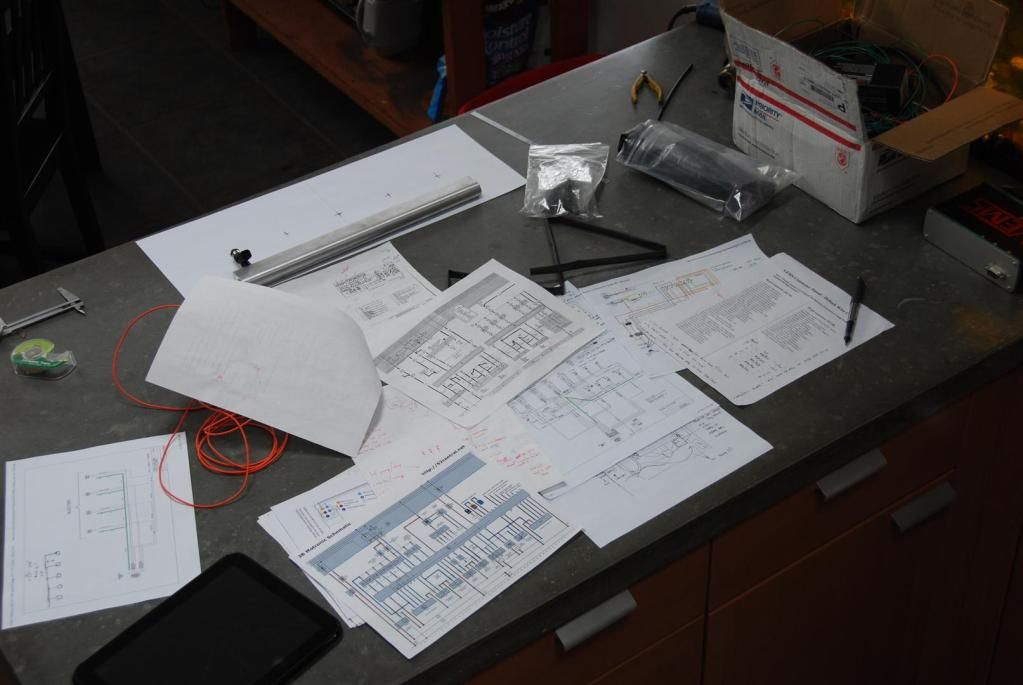
Here we go again…digging through the wiring diagrams for AAN…ABY…4KQ…URQ…CGT…lots of decisions to make…
I started with the injectors. They seemed easy enough to wire up for some practice and a good start to the VEMS engine harness.
These are some new take-off EV14 pigtails…and I liked the colors…
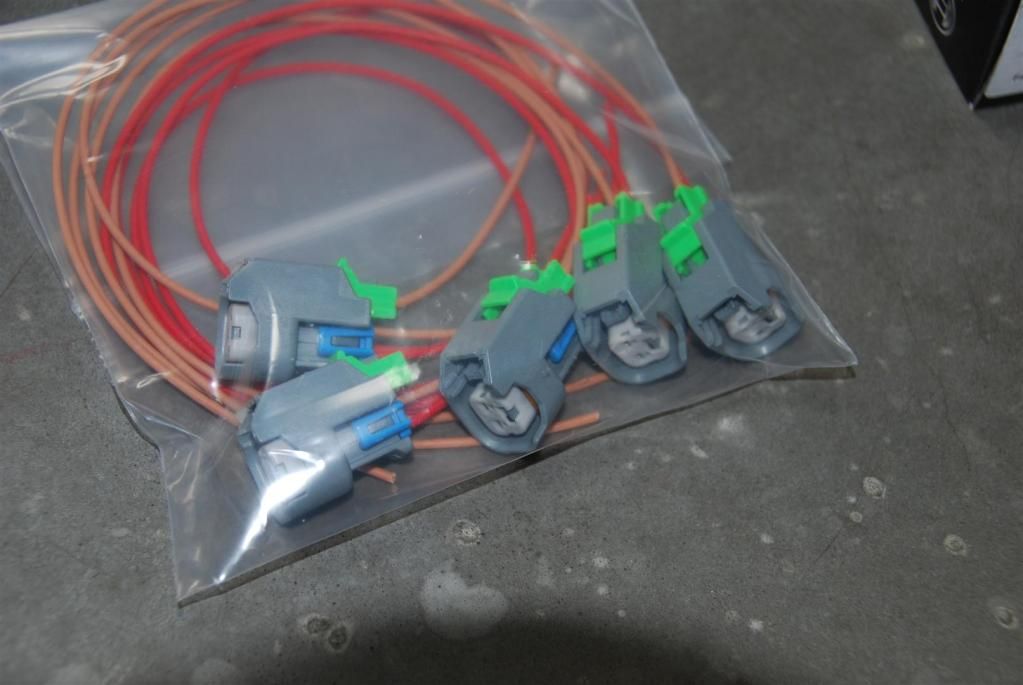
This was before I got my workbench back. So I started in the kitchen…
And then it was getting them tied together, spaced properly, and sealed up. You can’t use boots on this style of connector, but they do have the silicone seals around the individual wires entering the connector body.
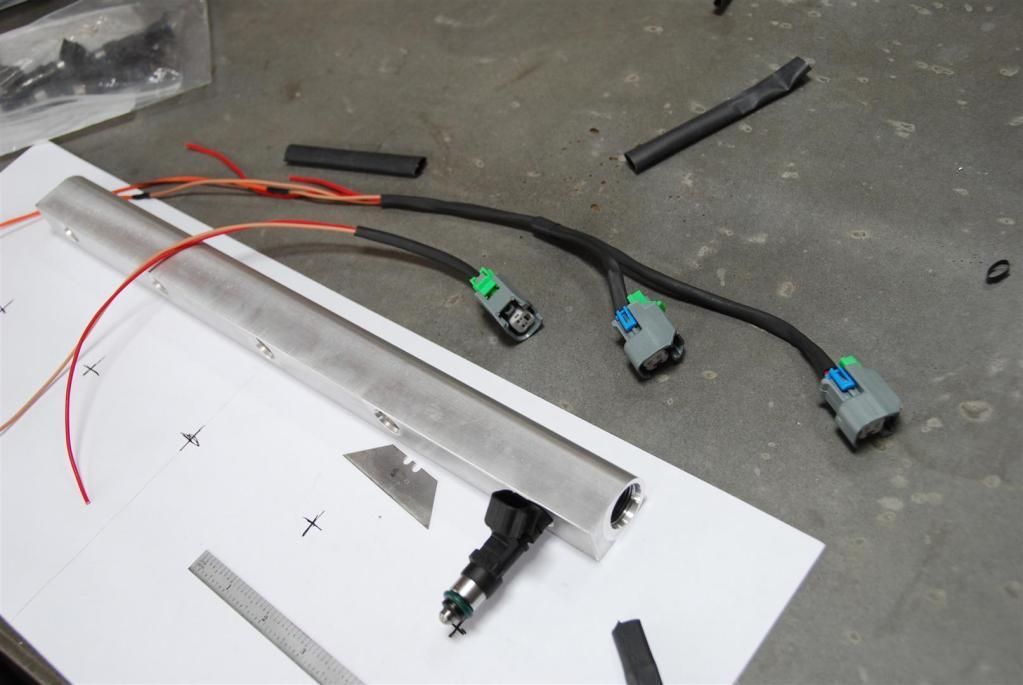
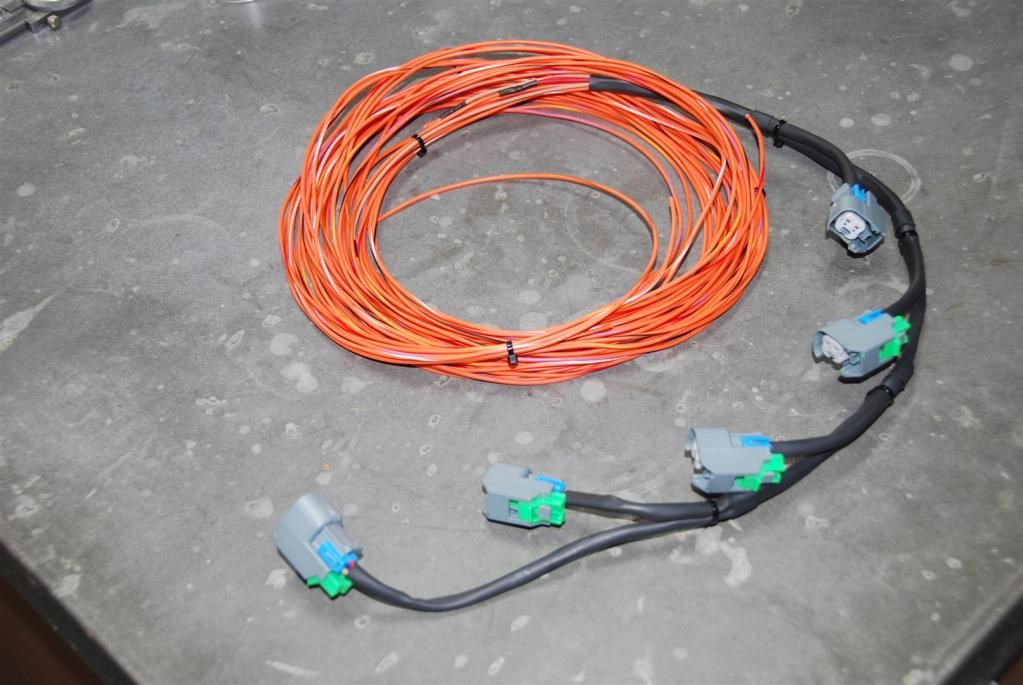
And here is the completed sub-harness. It will be tied with the other sub harnesses once final lengths are determined.
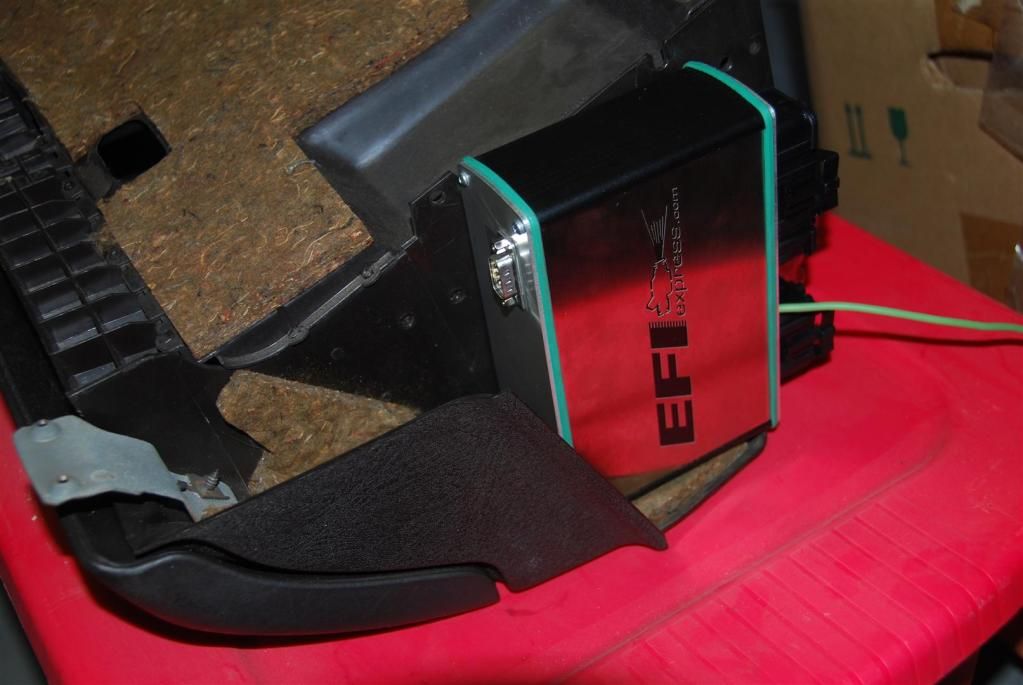
Speaking of final lengths, I’m thinking of mounting the VEMS box something like this. Orientation TBD…
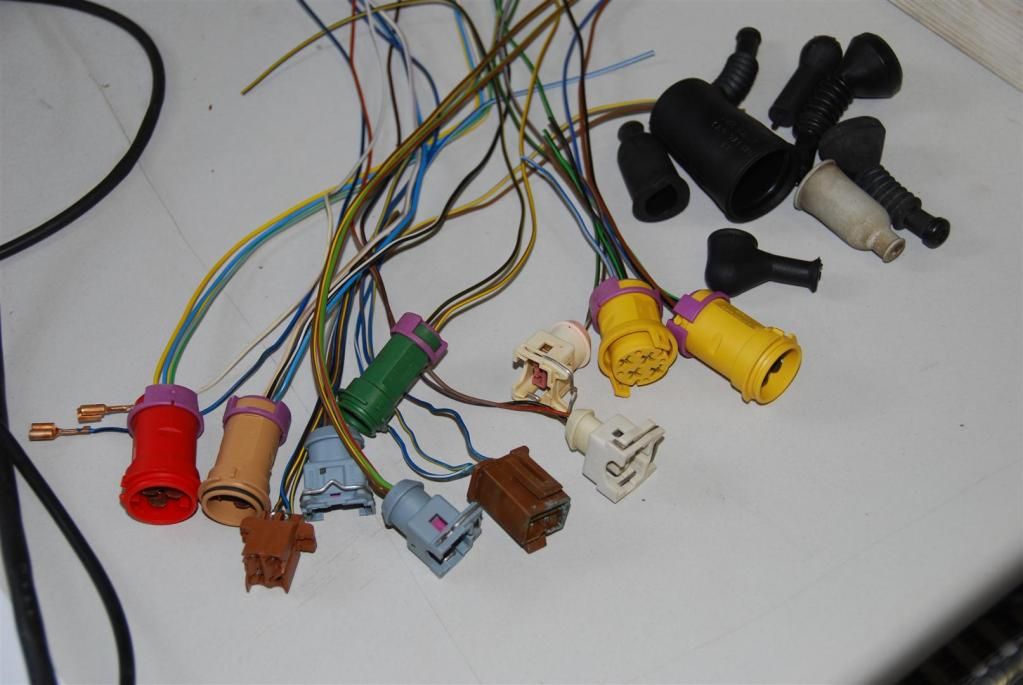
A collection of connectors to harness from my harness…
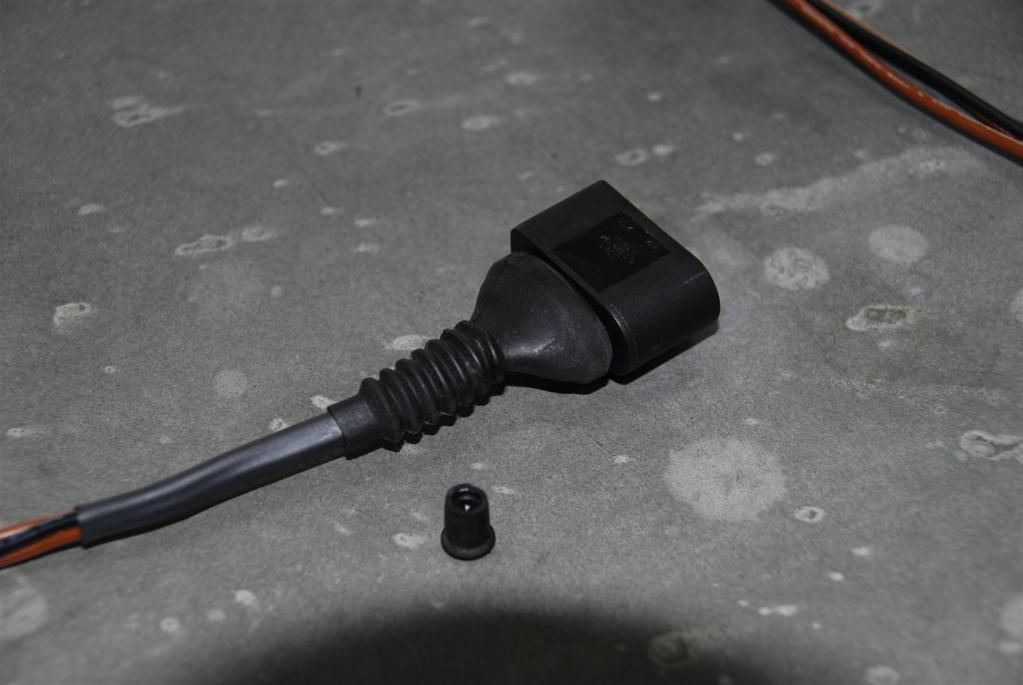
I pulled out some old connectors and cleaned them up a bit. I also got the boots, which are quite handy…
Some cleaned up boots that are sized for the 4-pin coil pack connectors…
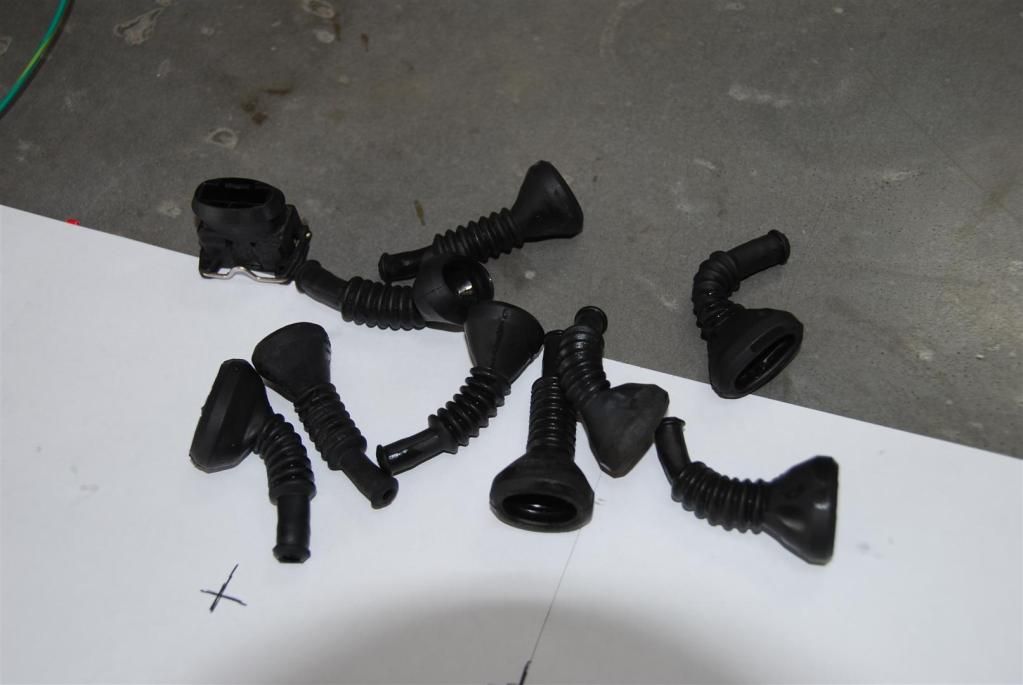
A slight modification and these will work just fine…
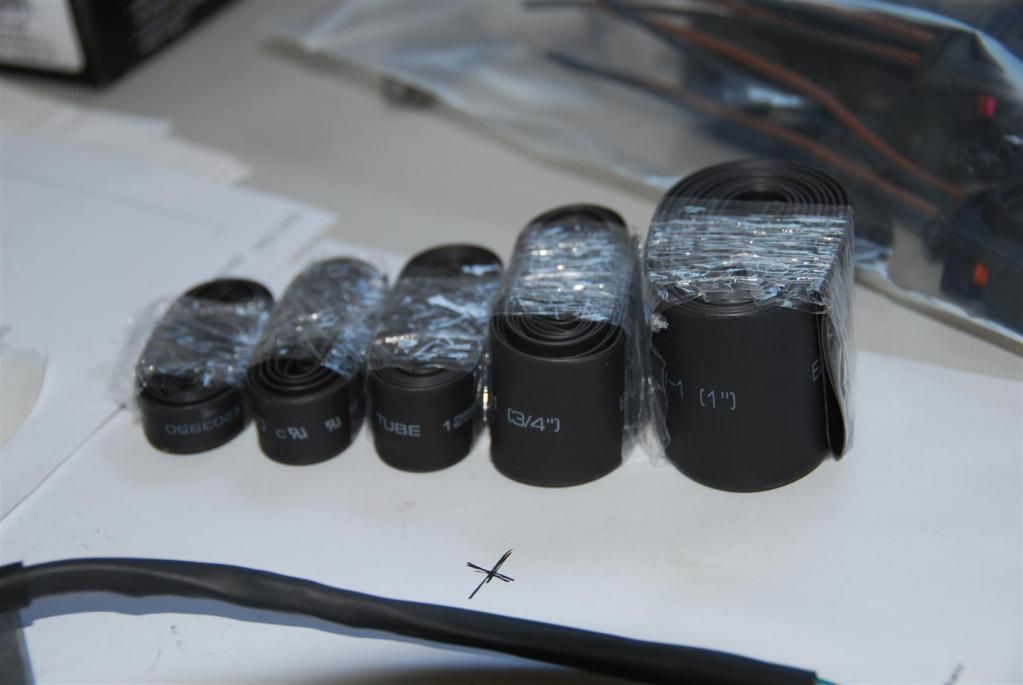
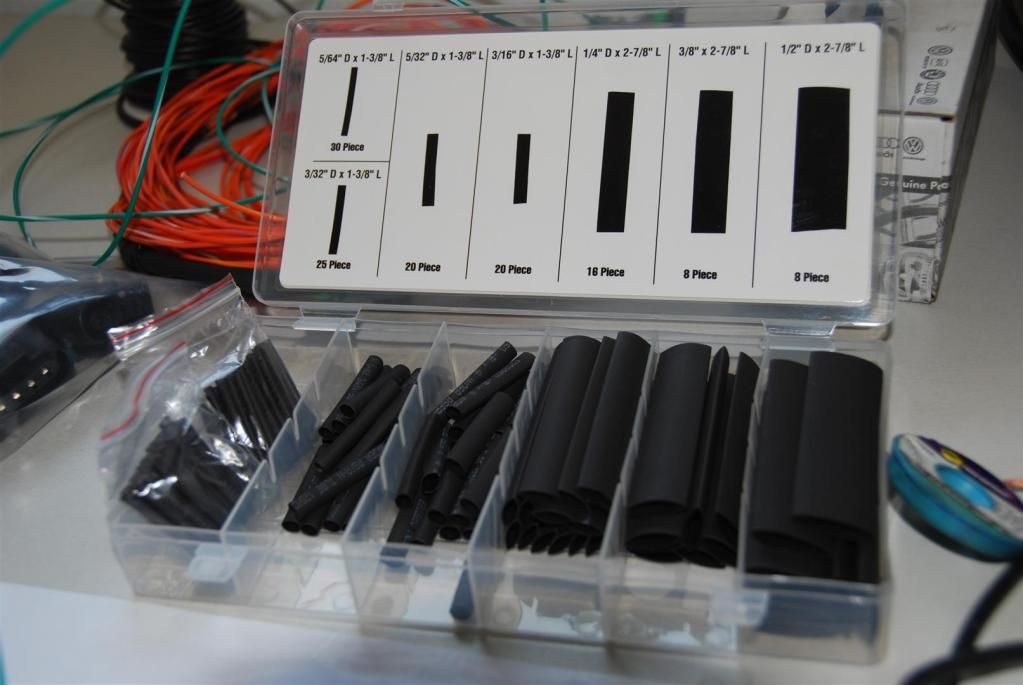
I also needed some more supplies for the harness. I got most of what will be needed out of two kits for less than $10 from Harbor Freight…Some 4 foot sections of various diameters…These will be used for holding bundles together.
And some smaller lengths, mostly used to cover bare metal contacts and joints…
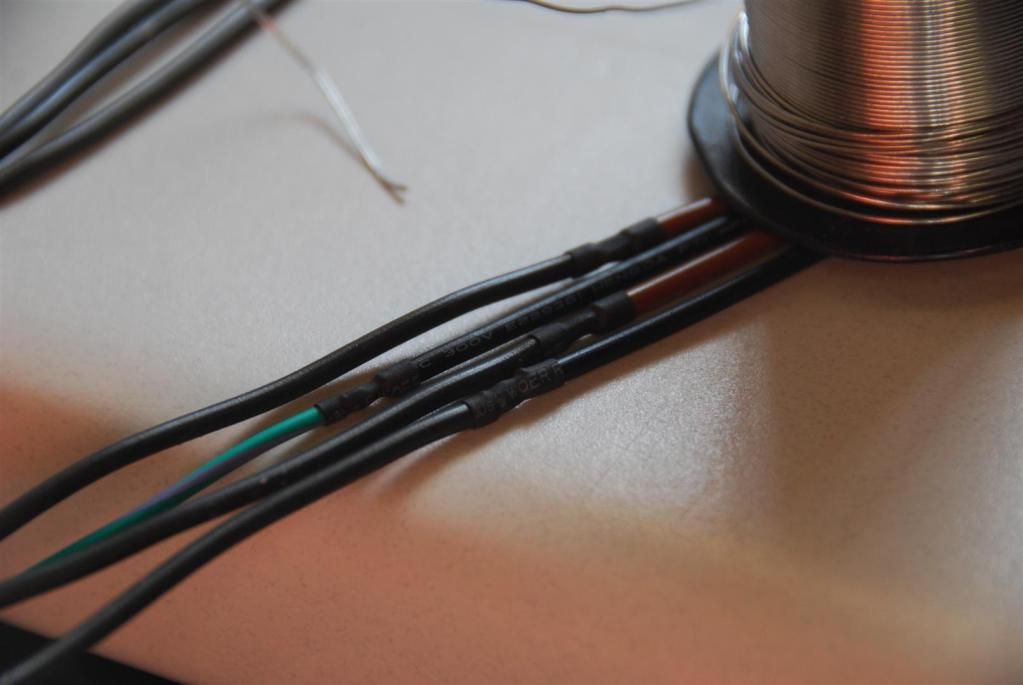
So then I started on the coil pack harness. Here is a sample of some of the many solder joints I’ve made. Each one trimmed of sharp edges, prior to heat shrinking, and staggered to minimize short circuiting through the thinner heat shrink sections…
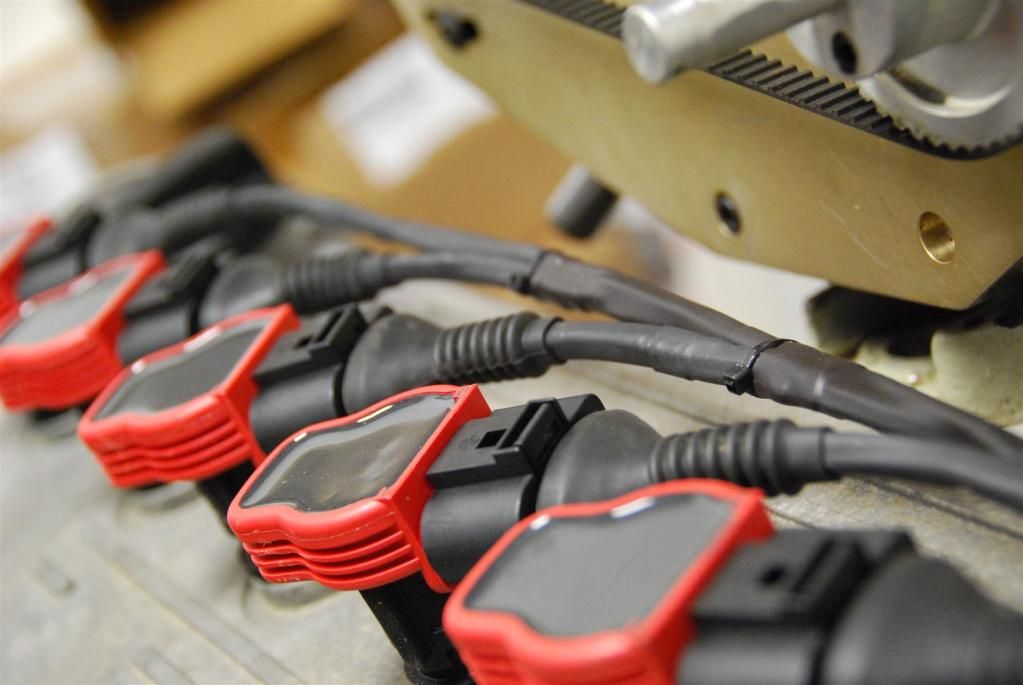
And here is the coil pack sub-harness mocked up in place and mostly finished on that end…The other end still needs a bit of work…
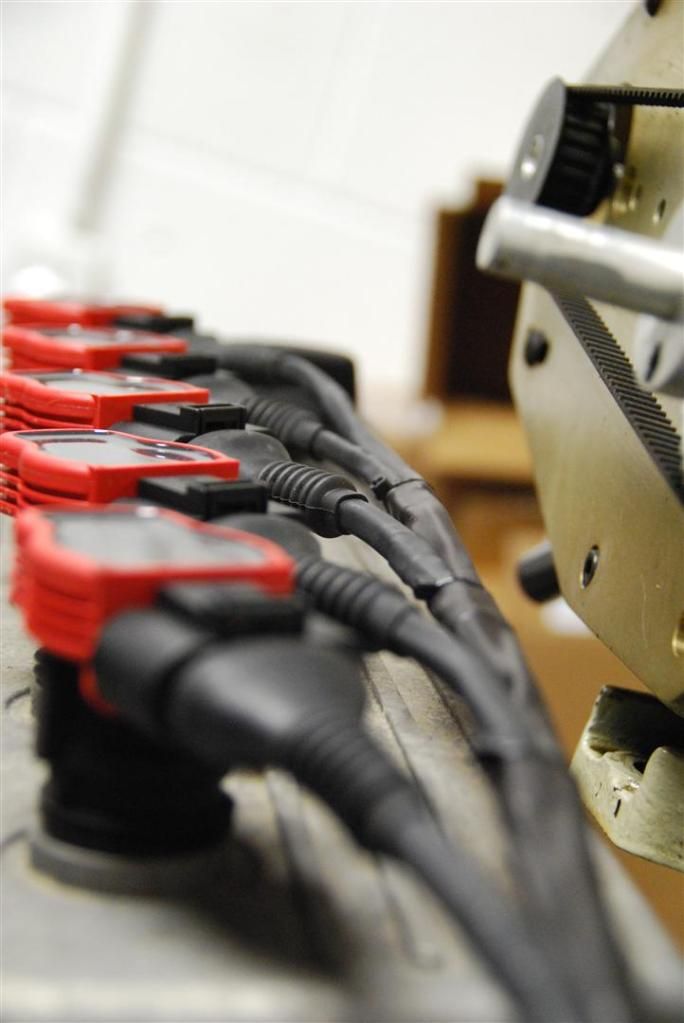
I like that…How about another angle???
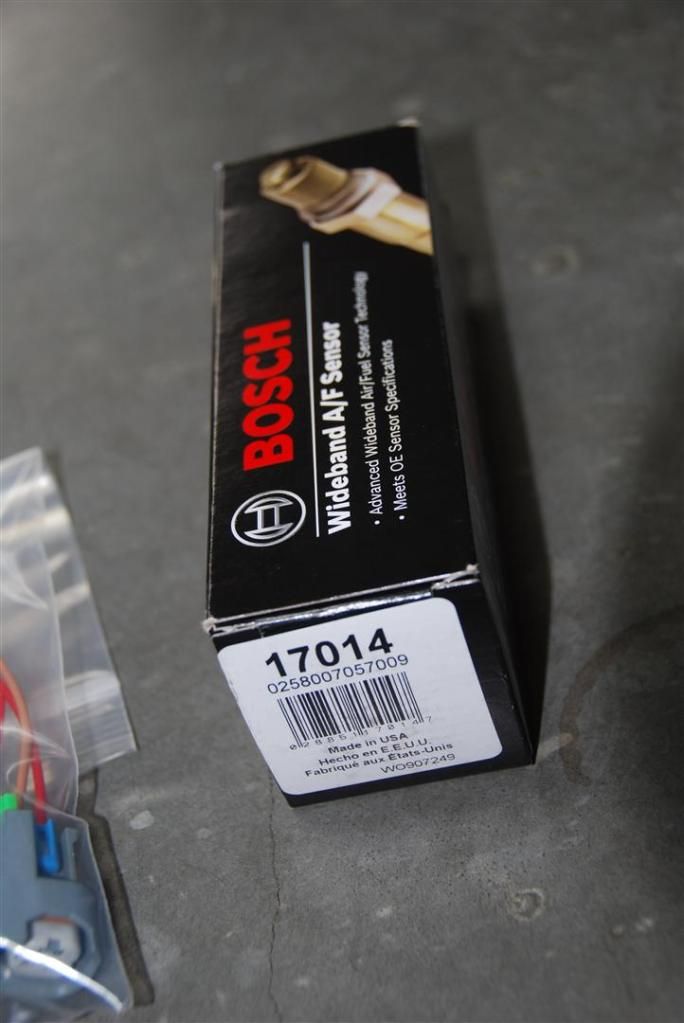
And then I started pulling together components to get a connector list together. I had to order a few things too…
Bosch WB…
I was disappointed to see an error in my VR6 TB purchase. I wanted OBD2 because it is bigger than the OBD1, but when I saw this, I failed to realize it was DBW. I need the DBC OBD2 one now. Oh well, I should be able to do a nearly straight across exchange…

And then finally got in the suspension/chassis parts I’ve been waiting 2.5 months for…
Control arm bushings and a rear diff mount…
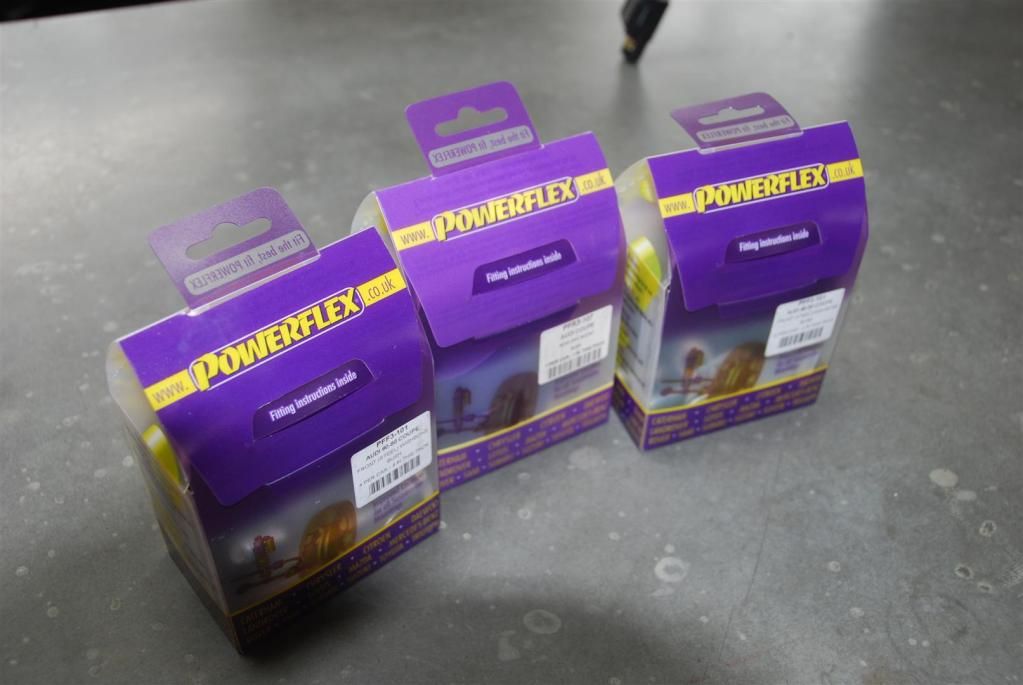
And some adjustable subframe mounts from 034…
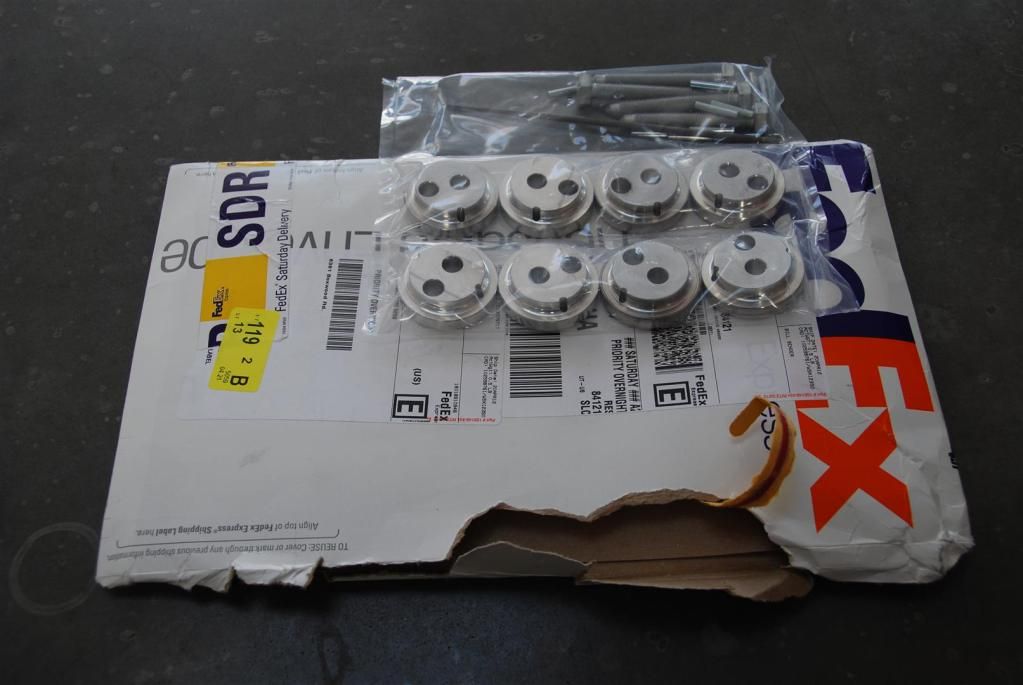
They were even kind enough to send them overnight for a Saturday delivery after a 2+ month backorder. How thoughtful! I’ve still got some things to pick up, but this will keep me moving forward for a while.
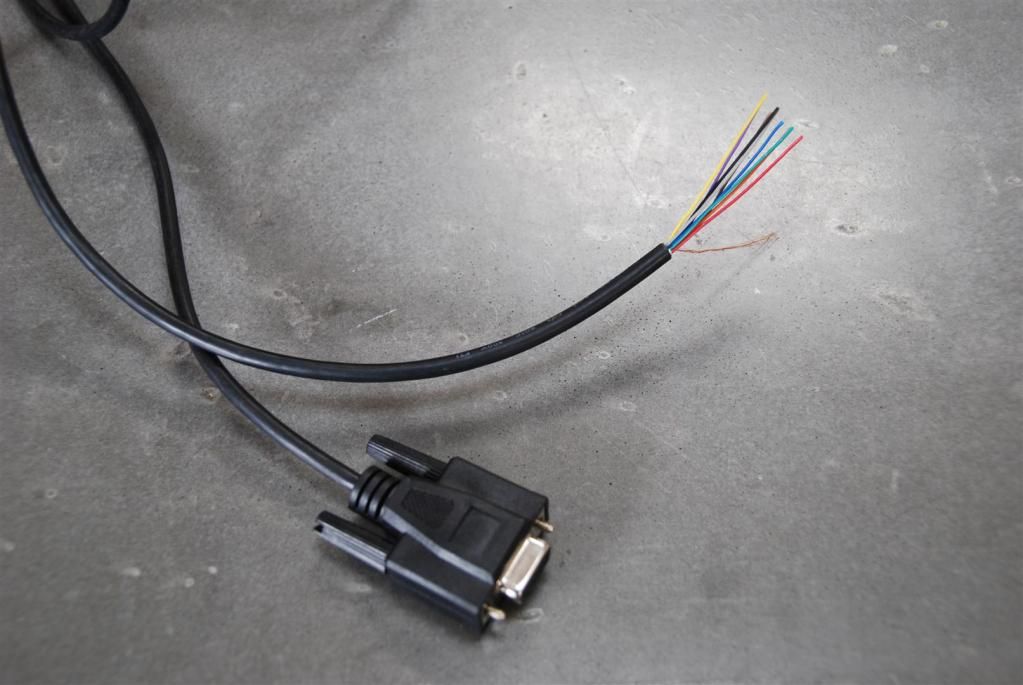
I had some old serial cables laying around and used one to connect my LCD to the VEMS unit. I cut one end off to connect to the LCD…
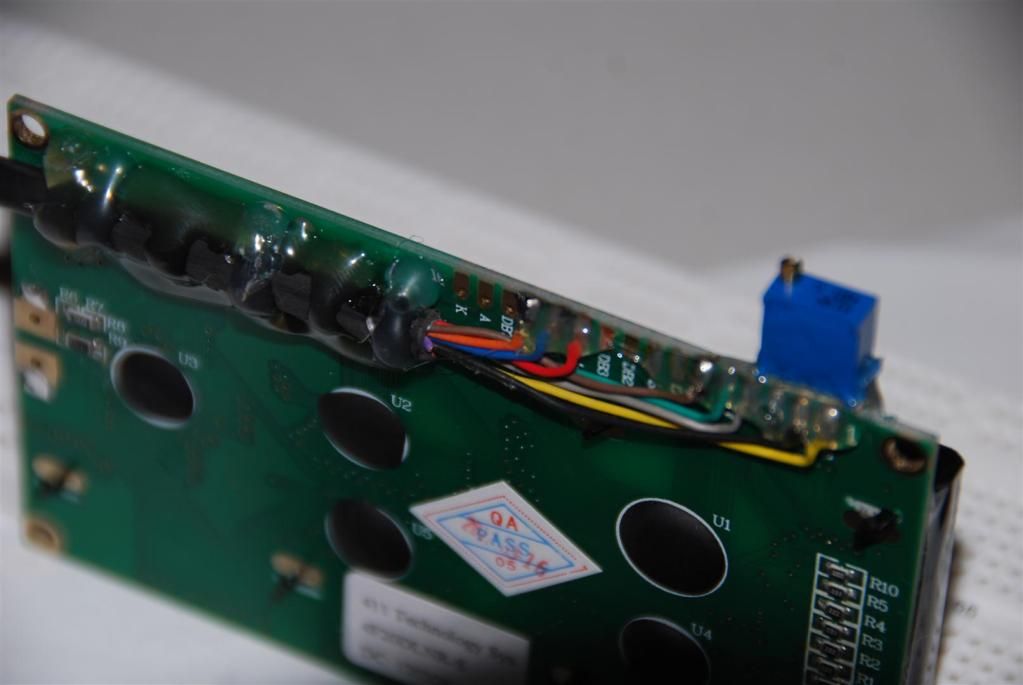
And following the pinout from the Wiki manual, I connected it. I also tied in a small potentiometer that is used to adjust the contrast.
I then tested out the backlighting on the display. As you can see, I had to pick a red one to use.
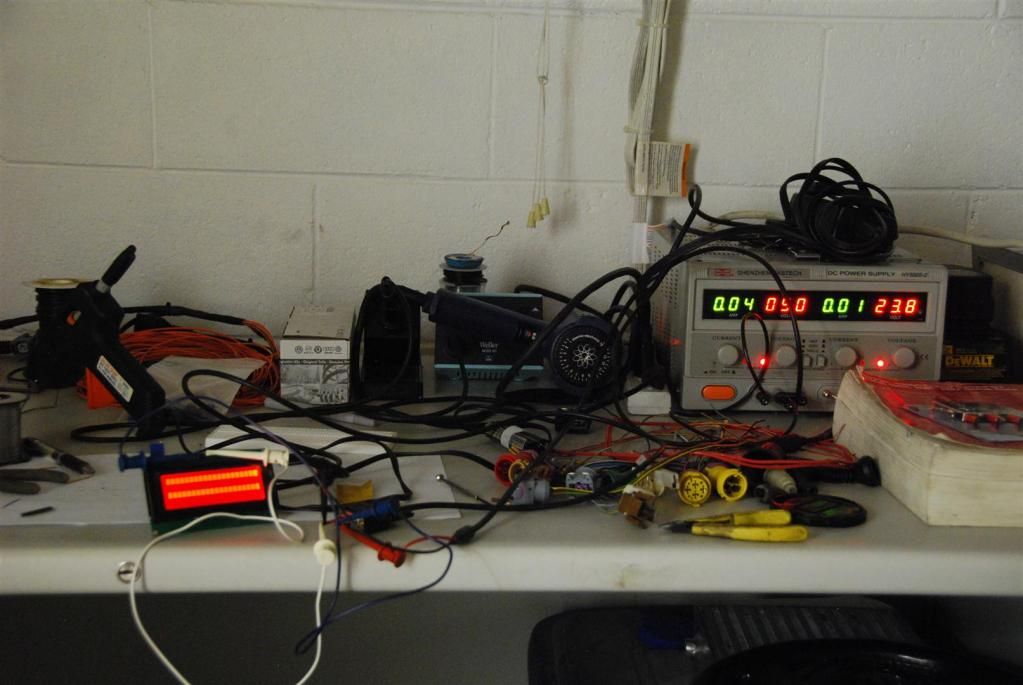
Now I need to decide if I want to toggle the backlight with a switch, or control it through a VEMS output. Details.
And then I was digging through some more parts and ran across this, which I hadn’t noticed until now…

That large guy was the original from the urq and the smaller is what I’ve usually seen on most of the cars I’ve worked on. So how
much heavier is it?
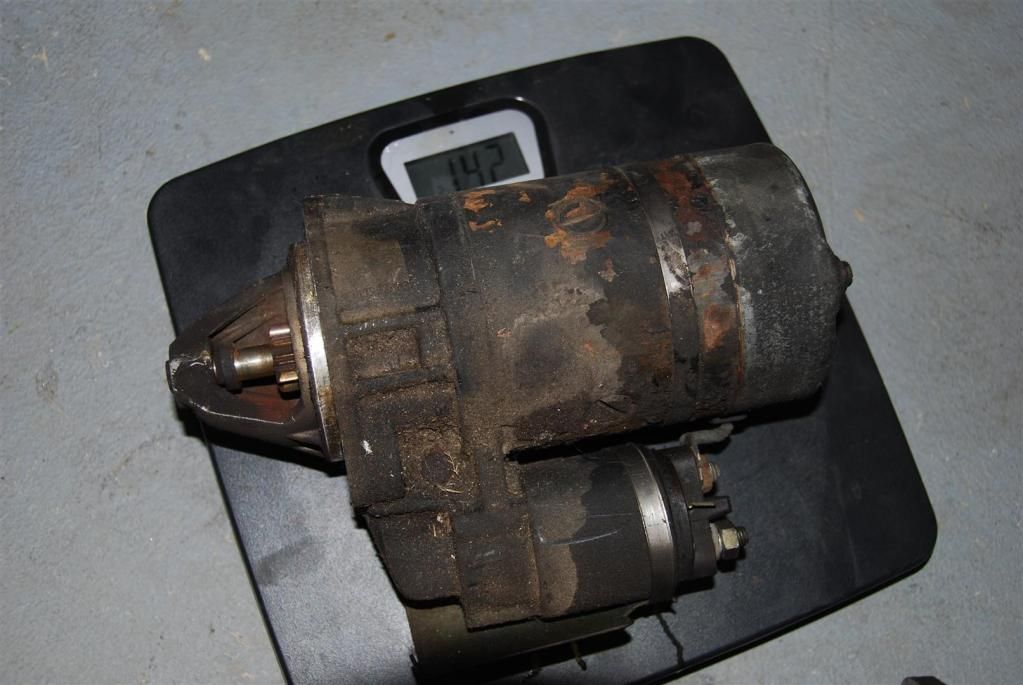
So I guess I should put this one in…

So here’s to about 6.4 lbs of reduction from in front of forward axle. Nice!
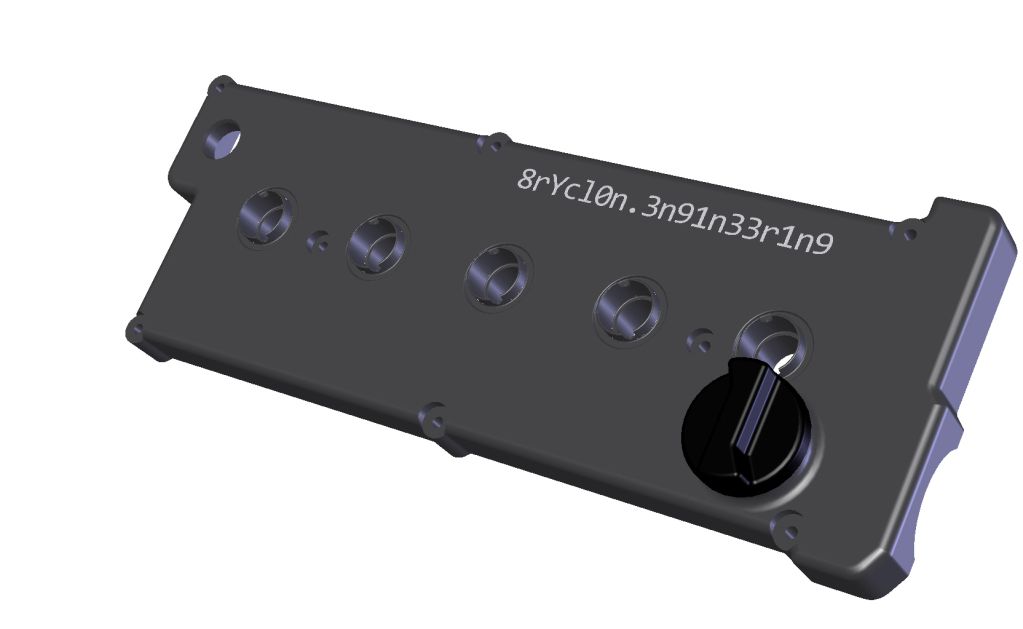
And then I started looking into what could be done with the 7A cover. I think it will work with a bit of machining. I installed a coil on a plug and made some measurements to determine its position WRT the valve cover.
Here is the interference that is the major problem…
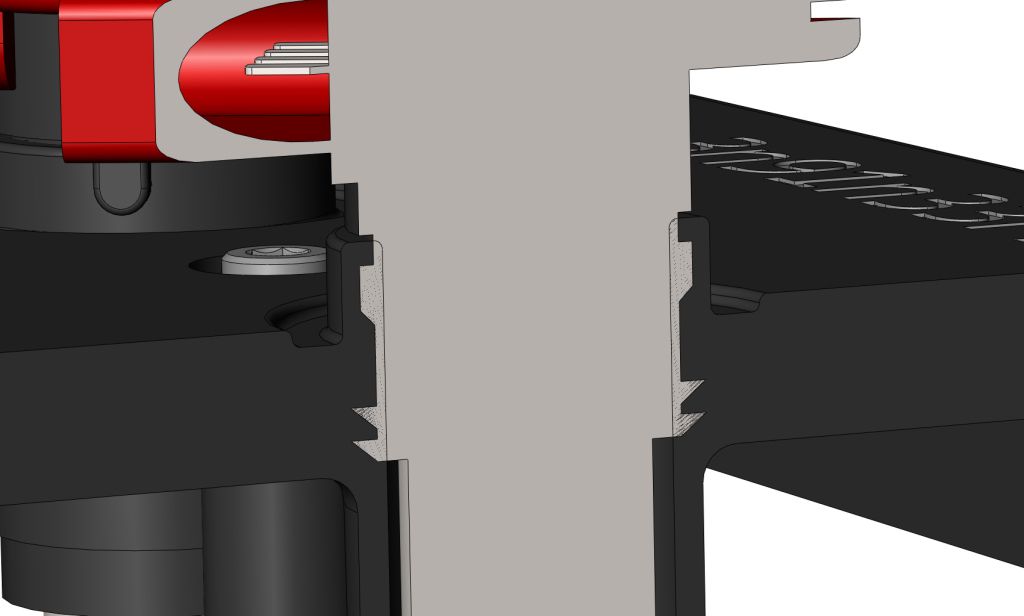
There should be enough meat to machine the bore a bit. This will leave a .050” rim width around the top…
![]()
A notch will also need to be cut into the rim at an angle corresponding to the coil pack orientations…
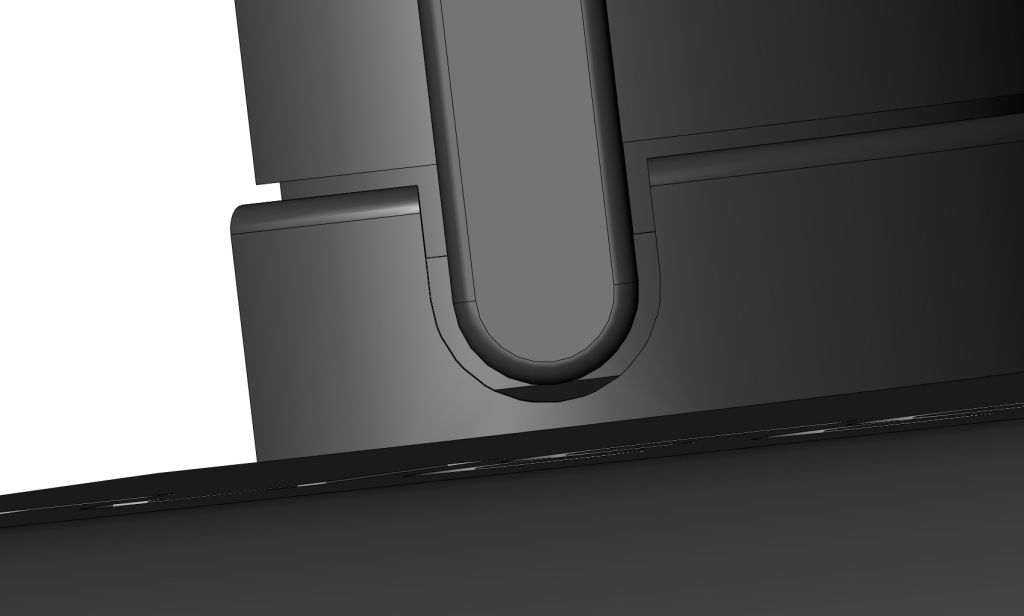
The actual orientation is dictated by the fill port on the cover. It forces the coil packs into the position with wires point to exhaust side of the head. Not optimal, but not a deal killer for me either…
There is not a lot of clearance. Some of the caps are a bit smaller too, which gives some more wiggle room…
![]()
Here is a close-up of what the bores will need to look like. The bore provides a friction fit on the rubber barbs and eliminates the need to clamp these down…or so the story goes…lol.
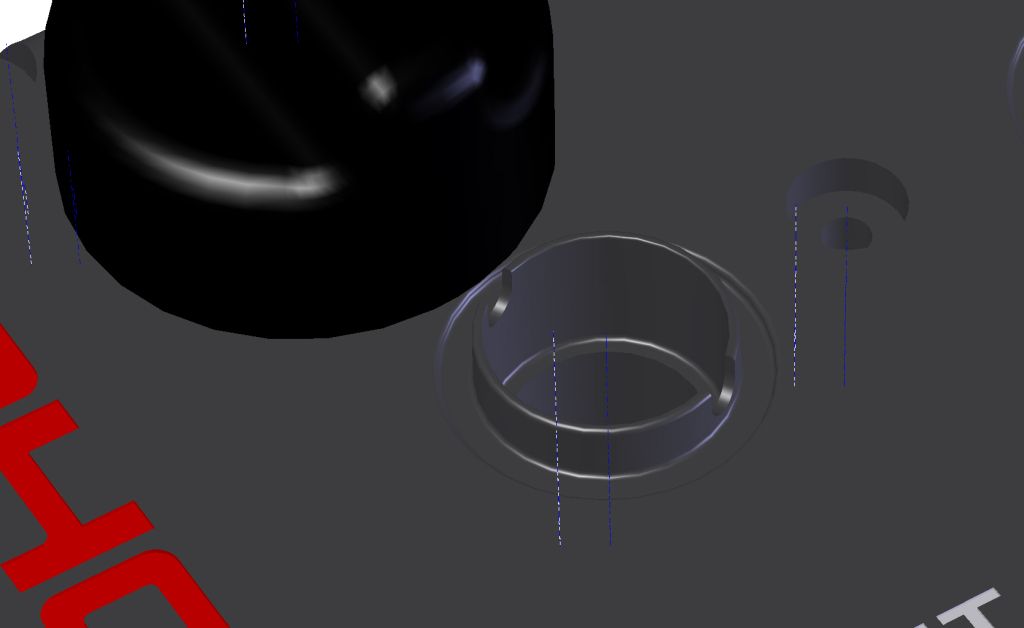
So I’ll machine the 7A cover to look something along these lines. And I’ll add a breather port somewhere…
So that was about two weeks’ worth of work and along with my spring time yard and gardening duties, I’ve been told I’m spending too much time out in the garage. So now I’ll be spending some time in the dog house, before I get back out there again…